Ohuhu Honolulu B 320 alcohol markers: my review, with proof of bleed-through
🛟️ Curious about these products?
I’ve reviewed them below, but if you already want to see them on Amazon:
 Ohuhu - Alcohol Markers
 Schoellershammer - Special Layout Pad for Alcohol-Based Markers, 75 gsm
As an Amazon Associate I earn from qualifying purchases. This does not change the price you pay.
Ohuhu Honolulu B 320: my full review
These are my first alcohol markers, and let me tell you straight away where this is going: the results are gorgeous, they are far easier to use than I feared, and they bleed clean through the paper. All three things are true at once.
I am showing you photos of the front and the back, because that is exactly the information I was looking for before buying and could not find anywhere.
What I bought, and what it cost
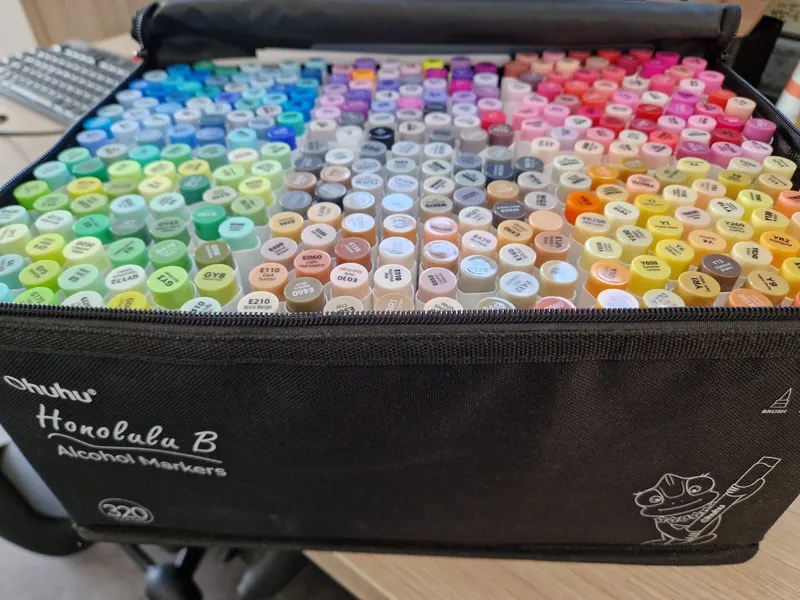
The Ohuhu Honolulu B set, 320 colours, dual brush and fine tips, supplied with its zipped carry case.
I paid 213 euros ordering directly from the Ohuhu website with a discount code. On Amazon it sells for 259.99 euros, which works out at 81 cents per marker. I am giving you both prices because I would rather you decided knowingly: the brand's own site was cheaper for me, Amazon is simpler if you want fast delivery and easy returns.
Either way this is an investment, not an impulse buy. Which is precisely why I am going into this much detail.
Two tips, and it is the right combination
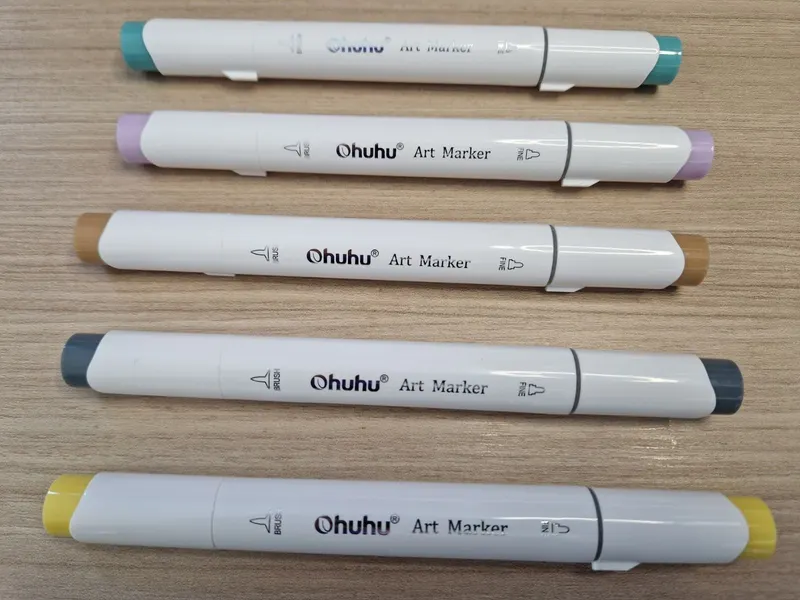
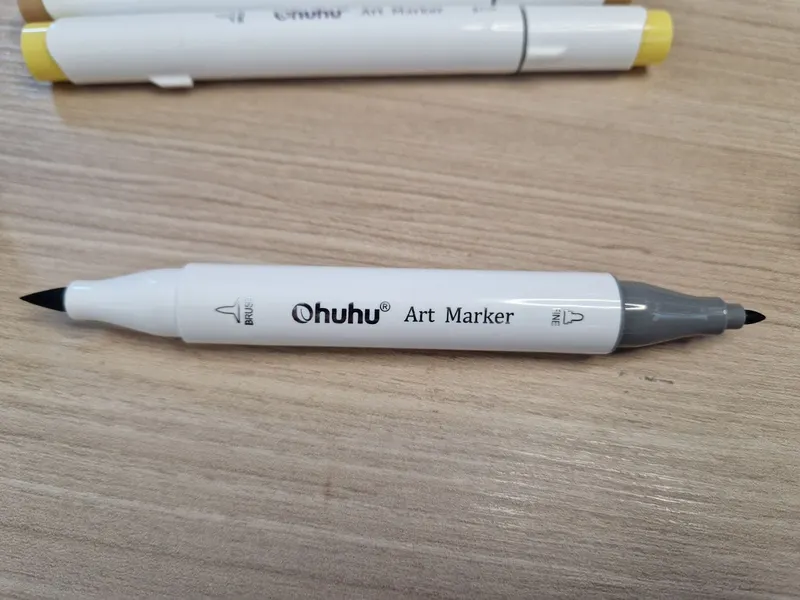
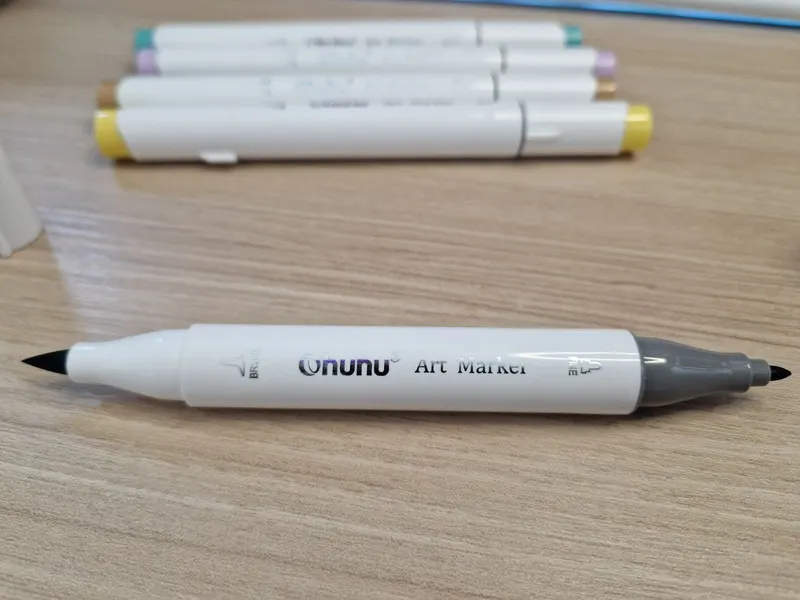
Every marker has a brush tip on one end and a fine tip on the other, labelled brush and fine right on the barrel, so there is no guessing.
The fine end is a genuine conical tip, not a chisel. It does all the work in small areas and is precise enough for tight outlines. The brush end fills large surfaces quickly.
320 colours, with a code you learn fast
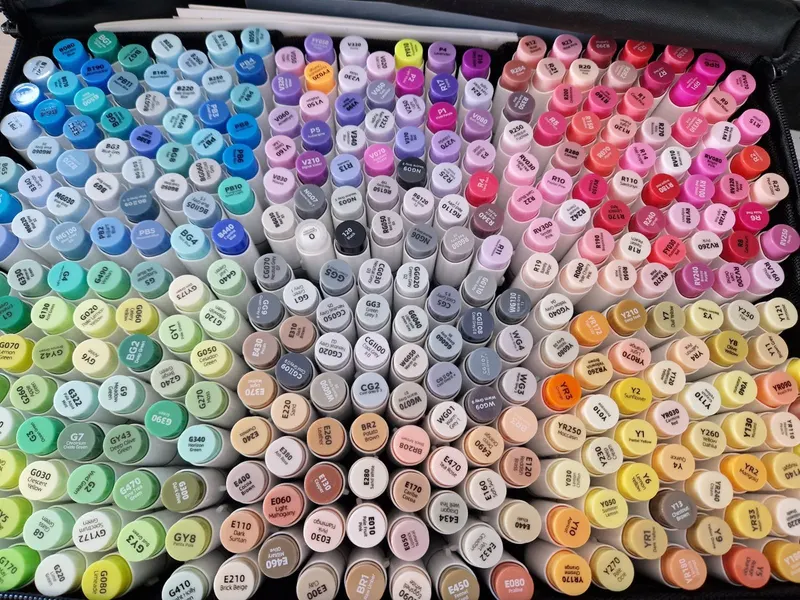
Each cap carries a code and a name: B for blues, G for greens, Y for yellows, R for reds, E for skin tones and browns, plus four separate grey families, cool, neutral, warm and green.
It is the same classification logic the premium brands use, and it clicks faster than you would think. After two or three colouring pages you reach straight for the right family without thinking about it.
The result, one single layer and no retouching
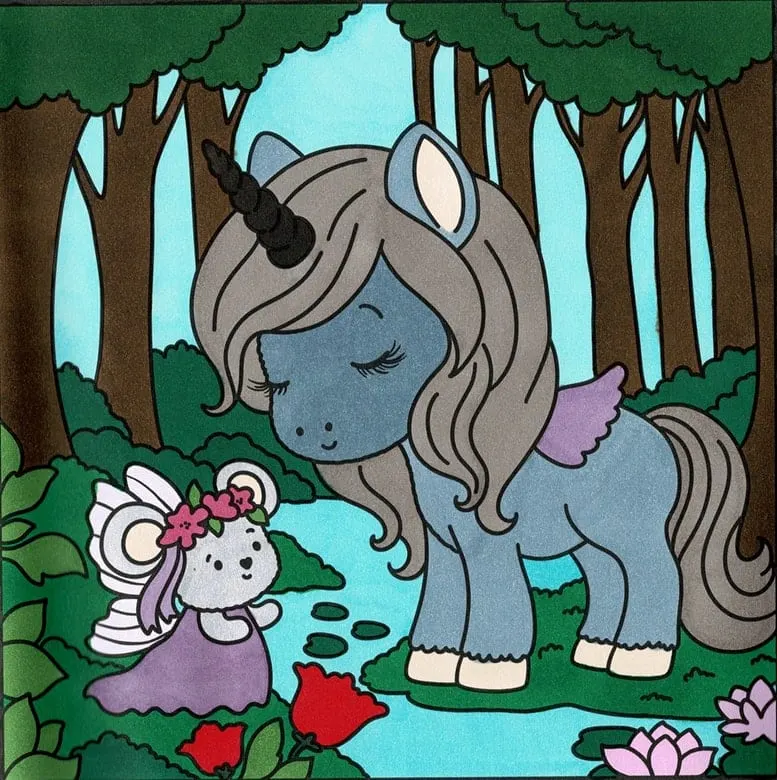
Here is the page I coloured for this test, from the Secret Forest Coloring Book. And one thing matters: I applied one single layer, I did not go over it with coloured pencils, and I added no shading at all. I wanted to show what the marker does on its own, not what my work does on top of it.
The colours are bold, the coverage is even, the edges are clean and nothing bled outside the lines. For one layer laid down without any particular effort, I find the result very tidy.
Now the back, and this is where it counts
Here is the reverse of that very same page. Not a neighbouring sheet, not another drawing: the exact back of what you just saw.
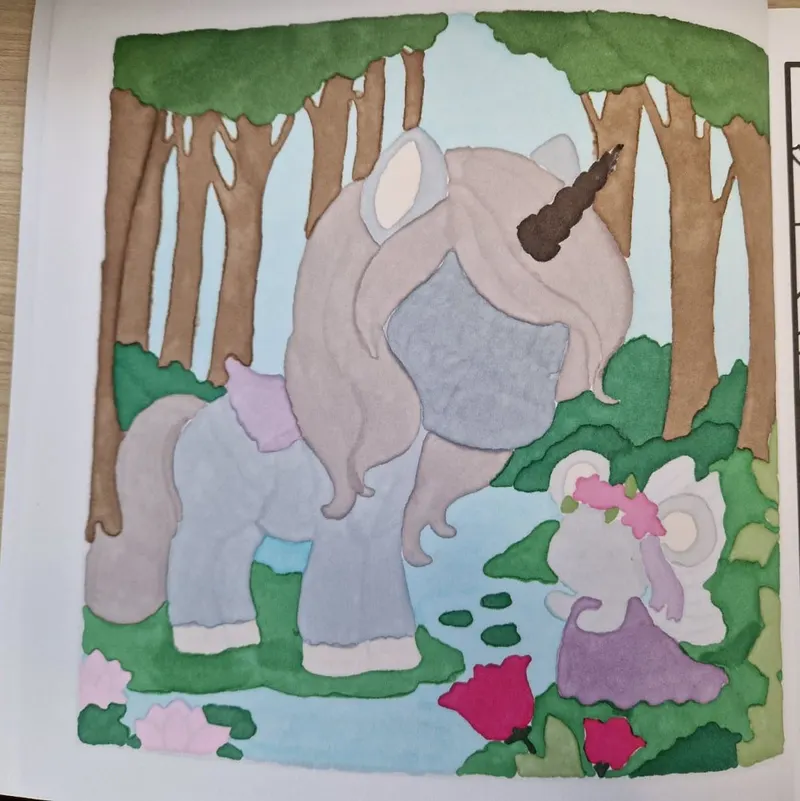
Every block of colour is there, in exactly the right place and shape. Slightly paler, and that is the only difference. Only the black outlines are missing, which makes sense: they are printed by the publisher, they did not come from my markers. Hence that odd watercolour-without-a-drawing effect.
What this means in practice: in a book printed on both sides, you lose one drawing out of two. This is not a faint halo showing through, it is the whole image landing on the other side.
My workaround: a sheet underneath
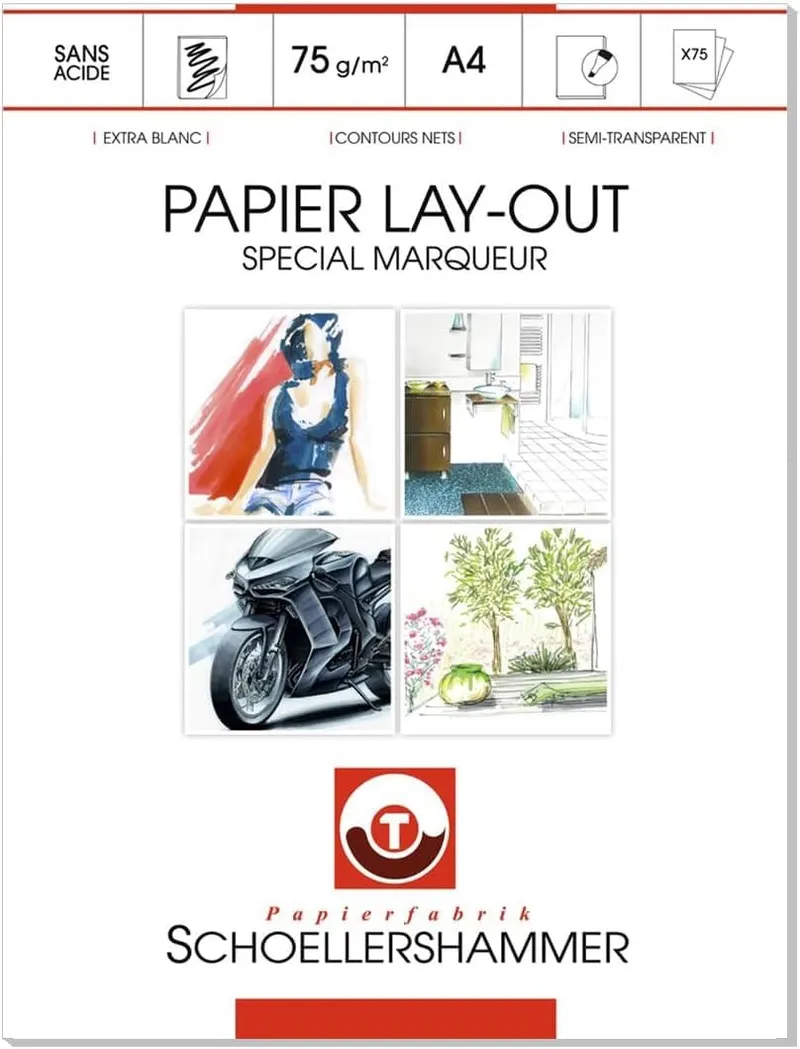
I always slide a sheet of Schoellershammer layout paper, 75 gsm A4, under the page I am colouring. I do it for every book, even the ones with thick paper.
Be clear about what this protects: the sheet soaks up the ink that comes through and saves the following pages. It does not save the back of the page you are currently colouring, that is mechanically impossible. But it stops the damage spreading through the rest of the book, and that alone is worth it.
The Secret Forest paper is not particularly thick anyway: you can already make out the next page through it before you even start.
A bled-through page is not a lost page
If you find out too late, do not throw anything away. Let it dry completely, turn the page over, and colour the bled side with acrylic markers in several layers. Acrylic is opaque, it covers very well, and you get your drawing back.
It is not the ideal solution, but it beats giving up on a page you spent two hours on.
And if you are still torn between the two families, I wrote a detailed comparison: alcohol markers versus acrylic markers, which one to choose.
The part that will surprise you: they are easier
We picture alcohol markers as specialist gear, reserved for people who already know what they are doing. My experience says the exact opposite: it is very hard to ruin a page with these.
Compare with an ordinary felt tip. Ordinary felt tips leave very visible streaks, and going over them again does not fix it, it makes it worse. They can bleed through too once you build up layers, and sometimes a single pass is enough. The result is uneven, you are disappointed, and the book goes back on the shelf.
Alcohol markers spread out on their own. It is cleaner, more even, prettier, and the result looks good even when you are starting out. For someone who is new and afraid of ruining a page, that is a genuine shortcut to actually enjoying it.
Another pleasant surprise: you do not need anywhere near as many colours as I bought. Going over a colour once it has dried darkens it, so you create your own shading with a single marker. A far more modest set already lets you do lovely work. My 320 colours are a luxury, not a requirement.
What to know before buying
The nibs cannot be replaced and the ink cannot be refilled. That is the real difference with professional brands, which you keep for years by refilling them. Here, when a marker is done, it is done.
At 81 cents each that stays very reasonable, and you will not burn through 320 markers any time soon. But it is worth knowing if you were comparing with refillable references at five or six euros apiece: the ten-year maths is not the same.
And there is an alcohol smell, as with every marker of this type. It has never bothered me, but if you colour for a long stretch, air the room.
Who they are for, and on what
These markers are made for surfaces with no back worth saving: loose sheets, tear-off pads, and above all printed colouring pages. On a single-sided print the problem vanishes entirely and only the qualities remain.
If you want to try them without sacrificing a book, start with a printed page. You will get everything I love about them, without the drawback that bothers me.
In a bound double-sided book, though, you have to accept losing every other page, or pass.
My verdict
Apart from the bleed-through, I honestly cannot find a real flaw. The results are beautiful, they are easy to handle, the precision in small areas is there, and the value for money is excellent for 320 colours.
These are not complicated tools for insiders. Quite the opposite: they are probably the surest way to get a beautiful result when you are just starting. You only need to know what to use them on, and now you do.
The visuals (illustrations, excerpts, photos) shown on this page are used for illustration purposes and remain the property of their respective authors/publishers. Trademarks and names belong to their respective owners. Colorings and photos are by Usako unless stated otherwise. Any reproduction, distribution, or commercial reuse is not allowed without the prior consent of the rights holders.